
What is cPanel (Control Panel for Website Management)?
cPanel is a web-based control panel that allows users to manage their websites, domains, emails, databases, and files easily.
- Primarily used by website owners and hosting clients
- Provides a graphical interface for managing web hosting without command-line tools
- Integrated with WHM for server-level management
Use Cases: cPanel Integration with StorX
Automatically backup website files, databases, and emails from cPanel to StorX. Ensure disaster recovery in case of server failures, hacking, or accidental deletions.
Quickly restore websites, databases, and configurations from StorX in case of system crashes. Migrate cPanel accounts easily to a new server.
Offer remote backups to clients as an add-on service. Protect customer data from local hardware failures and data loss risks.
Store server logs, configurations, SSL certificates, and other important files securely. Retain logs for compliance and security auditing.
Prerequisites
- cPanel account with data to backup
- StorX account with access credentials
- s3cmd tool installed on your server
- Linux-based operating system (AlmaLinux, Rocky Linux, CentOS, etc.)
Step 1: Configure cPanel Backups
a. Enable Native cPanel Backup:
- In WHM, navigate to Backup Configuration
- Enable backups and choose your preferred backup type (full or incremental)
- Set the backup schedule (daily, weekly, etc.)
- Specify a local backup destination (e.g.,
/home/backup/)
b. Verify Backup Output:
- Ensure backups include customer accounts, databases, and configuration files
- Test a manual backup from cPanel to confirm files are generated
Step 2: Install and Configure s3cmd
a. Install s3cmd:
dnf install -y s3cmd (for RHEL-based systems)
apt install -y s3cmd (for Debian/Ubuntu)

b. Verify installation:
s3cmd --version

c. Configure s3cmd with StorX Access Credentials:
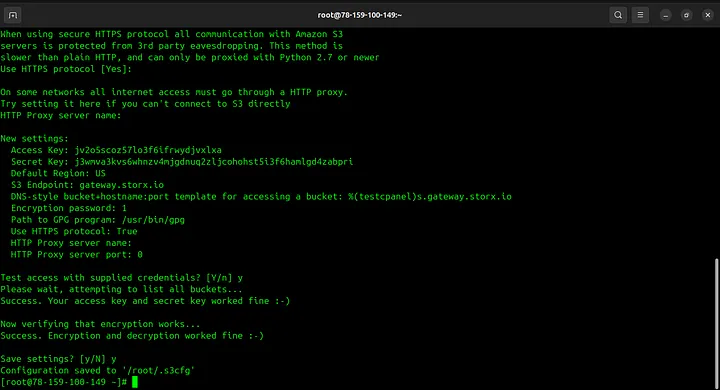
s3cmd --configure
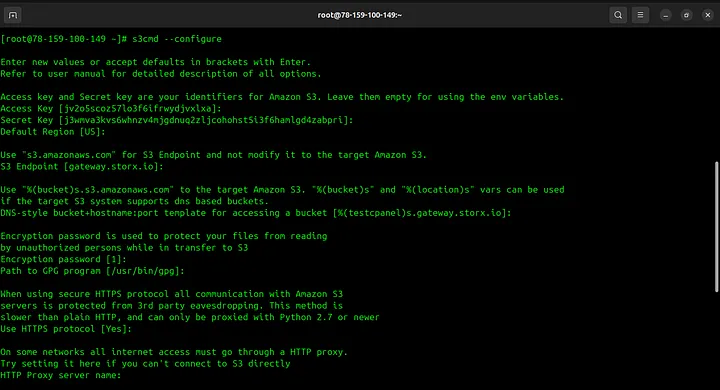
Configuration Tips:
- Access Key: Your StorX Access Key
- Secret Key: Your StorX Secret Key
- S3 Endpoint:
gateway.storx.io - DNS-style bucket template:
%(bucket)s.gateway.storx.io - Use HTTPS protocol: Yes
Step 3: Test Manual Backup
Test the connection by uploading a backup manually:
s3cmd put /backup/your_backup_file.tar.gz s3://your-vault-name/

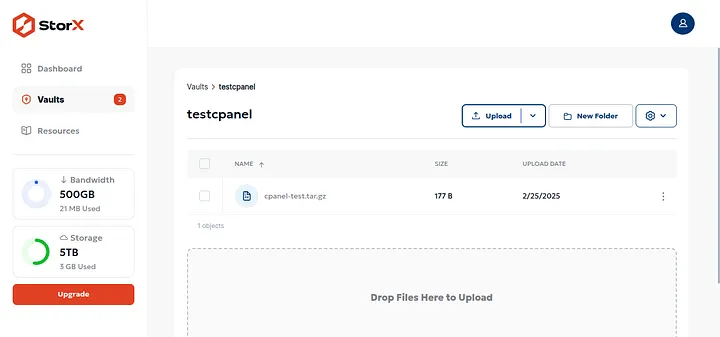
Verify the upload in your StorX vault:
Step 4: Automate Backups with Cron
a. Create a backup script:
nano /usr/local/bin/cpanel-storx-backup.sh
Add the following content:
#!/bin/bash
# cPanel to StorX Backup Script
DATE=$(date +%Y%m%d)
BACKUP_DIR="/backup"
VAULT_NAME="your-vault-name"

# Create compressed backup
tar -czf $BACKUP_DIR/cpanel-backup-$DATE.tar.gz /home/* /var/cpanel

# Upload to StorX
s3cmd put $BACKUP_DIR/cpanel-backup-$DATE.tar.gz s3://$VAULT_NAME/

# Remove local backup (optional)
rm $BACKUP_DIR/cpanel-backup-$DATE.tar.gz

echo "Backup completed on $(date)" >> /var/log/cpanel-storx-backup.log
b. Make the script executable:
chmod +x /usr/local/bin/cpanel-storx-backup.sh
c. Add to crontab:
crontab -e
Add this line for daily backup at 2 AM:
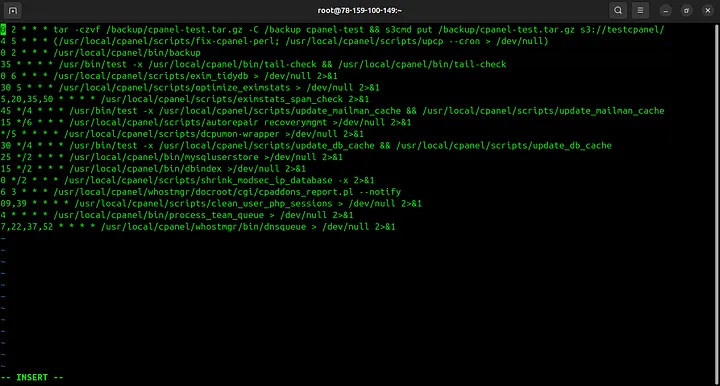
0 2 * * * /usr/local/bin/cpanel-storx-backup.sh

✓ Automation Complete! Your cPanel backups are now automatically uploaded to StorX on a daily schedule. Your website data is securely stored in decentralized storage.
Additional Tips
- Monitor backups: Check
/var/log/cpanel-storx-backup.logfor backup status - Retention policy: Implement a retention policy to manage backup versions
- Test restores: Periodically test restoring from StorX to ensure backups are valid
- Encryption: Consider encrypting sensitive backups before upload