
What is MSP360 Drive?
MSP360 Drive enables you to work on any file stored in your StorX account directly from Windows Explorer. Using MSP360, you can make your cloud storage available as local Windows disks or network drives, providing seamless access to your decentralized storage.
Download MSP360 Drive: https://www.msp360.com/drive/
Before you begin: You need an active StorX account with access credentials. Join StorX →
Required StorX Credentials
- Access Key - Your unique access identifier
- Secret Key - Your private security key
- Endpoint URL -
https://gateway.storx.io
Need help getting your credentials? Learn how to get Access Keys →
Setup StorX Account with MSP360 via S3 APIs
This is a one-time process to configure your StorX account in MSP360.
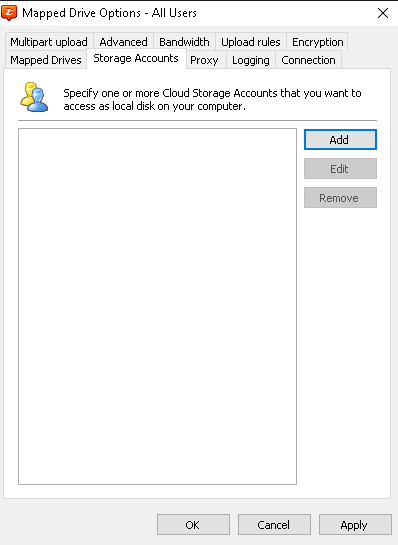
1. Go to the Storage Account tab from the configuration menu:
2. Click Add and enter the following in the Add Storage Account pop-up:
- Storage Provider: S3 Compatible
- Service Point:
https://gateway.storx.io - Access Key: Your StorX Access Key ID
- Secret Key: Your StorX Secret Access Key
- Use SSL: ✓ Check this box
- Signature Version: Select 4 (or 2 if needed)

3. Click Test Connection and then click OK to verify the connection and API key set.
- A success message will confirm that the connection and API credentials are validated against StorX.
Note: You may need to restart your machine after adding the storage account for changes to take effect.
The newly created account will be listed as a valid account under Storage Account:
Attach a Bucket or Folder as a Network Drive
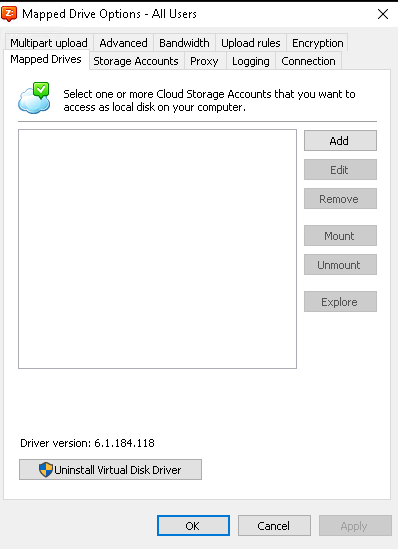
1. Go to the Mapped Drives tab to set up a mapping between your StorX account and a Windows drive letter.
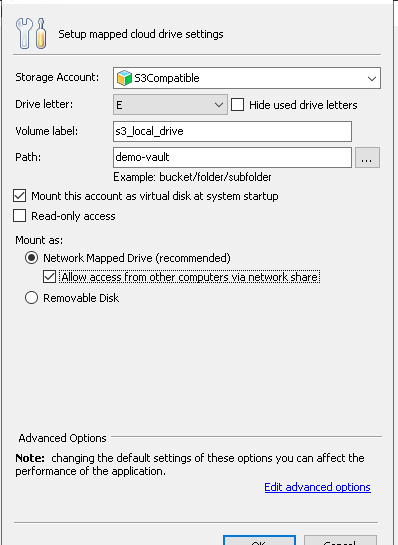
Click Add and enter the following:
- Storage Account: S3Compatible
- Drive Letter: Choose your preferred drive letter (e.g., X:, Y:, Z:)
- Volume Label: Enter a name for the volume (e.g., "StorX Drive")
- Path: Click Action to browse and select your StorX vault/bucket
2. Click OK to complete the mapping.
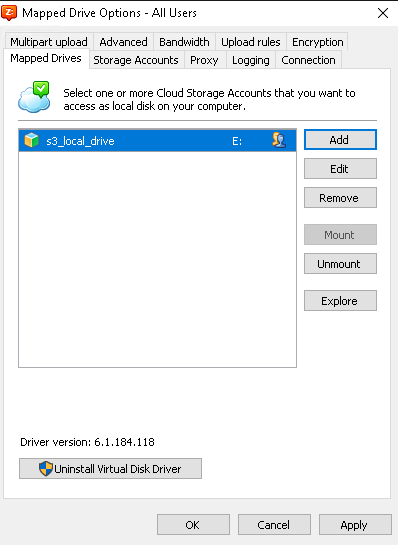
After successful mapping, your StorX drive will appear in Windows File Explorer just like any local drive:
✓ Integration Complete! Your StorX decentralized storage is now mounted as a network drive in Windows. You can access, edit, and manage your files directly from File Explorer.
What You Can Do Now
- Direct Access: Open files directly from StorX without downloading
- Drag and Drop: Easily move files between your local drives and StorX
- Work Offline: Files are cached locally for offline access
- Auto-Mount: Configure MSP360 to automatically mount the drive at startup
- Multiple Drives: Map multiple StorX vaults as different drive letters
💡 Pro Tip: MSP360 Drive supports caching options. In the advanced settings, you can configure cache size and location to optimize performance for your workflow.